
Building a Road Trip Display with ESP32, Android, and a MAX7219 LED Matrix
This site utilizes Google Analytics, Google AdSense, as well as participates in affiliate partnerships with various companies including Amazon. Please view the privacy policy for more details.
“How many more minutes until we get there?” That question must be my kids’ version of “Are we there yet?” because they’ll ask that question as soon as we head somewhere… And multiple times throughout any trip.
So I figured I’d build something that shows them exactly that - how many minutes (and hours) until we reach our destination.
What did I end up building? An Android app that displays the distance (in miles) and time (in hours and minutes) until we reach a certain destination, and a MAX7219 LED dot matrix display connected to an ESP32 DevKit that displays the time (again, in hours and minutes) that it receives from the Android app via Bluetooth.
The ESP32 DevKit and MAX7219 LED Dot Matrix Display
 The ESP32 DevKit sitting on top of the box it came in.
I won’t go into too much detail on the actual process of wiring up and writing the ESP32 code (which was Arduino code) - I used this MAX7219 LED dot matrix display Arduino tutorial and this ESP32 - LED Matrix guide - but I will point out a few problems I encountered on the way:
- Initially my computer couldn’t detect the ESP32 via USB - after reading about the same issue on reddit I needed to install the correct drivers
- Also, I needed to solder and connect the LED dot matrix display to the ESP32 before powering on the ESP32 (i.e. connecting it to a USB power supply, including the USB port on my computer). Otherwise the LED display didn’t display anything, or sometimes random LEDs would light up in no logical pattern.
I probably haven’t soldered anything in 20 years, and I couldn’t find my old soldering iron, so I ended up buying a new soldering iron. I like the one I linked to because it came with a case an analog-style temperature adjustment.
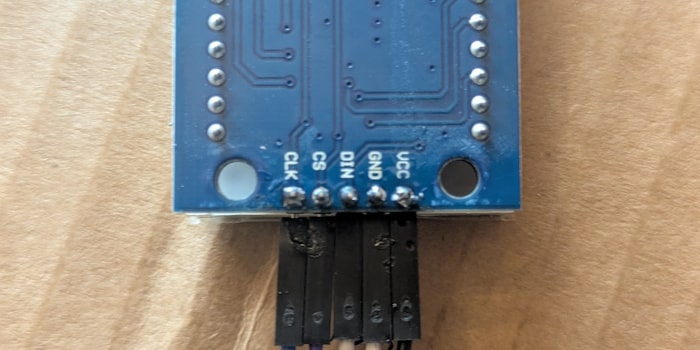 My soldering job - you might be able to tell I went from right to left by the quality of the solder joints
My hands tend to be a bit shaky - especially when I’m trying to do precision work - so I was worried my soldering abilities wouldn’t be good enough. Thankfully, I was able to do at least a good-enough job.
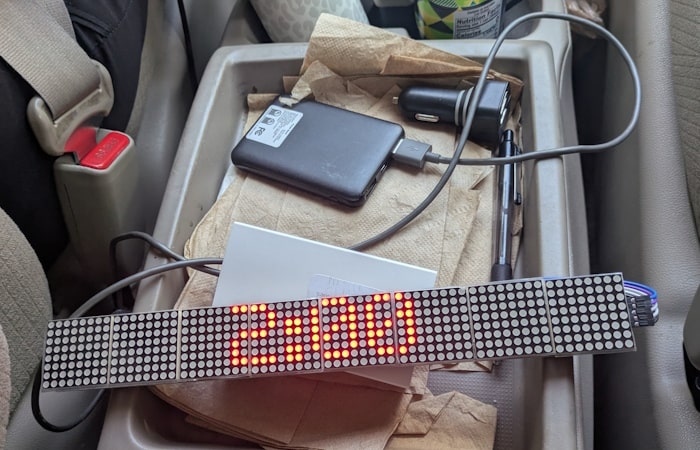 The LED Matrix Display saying we have 2 hours left on our trip
The Android App
Graphically, the Android app is pretty simple: two text views showing the distance and time left, and some smaller text views at the bottom showing the destination latitude and longitude:

The latitude and longitude were necessary mostly for debugging purposes. The destination is set by sharing to the app - typically from Google Maps itself - and sometimes the way I parsed the destination coordinates sometimes produced wildly incorrect values - normally 0 and 0, although once there was a value of somewhere around 1700 - way above any reasonable latitude or longitude value.
As far as how I determined distance and time to the destination, I used three different methods. These three different methods (not to be confused with method as in a class-based function in Java) where all extensions of an interface I called TripInfoProvider and injected into another class I called TripInfoViewModel via good old dependency injection.
The first method I created was the simplest - CountdownTripInfoProvider. This one takes minutes and miles as parameters and, each time minutes or miles are queried - subtracts one. Highly inaccurate but useful for testing.
The second method I created was also pretty simple - LocationBasedTripInfoProvider. This one takes the destination latitude/longitude (as an android.location.Location) and calculates the direct miles between the destination and the user’s current location. For minutes left, it’s assumed that the user is always travelling exactly 60 mph. In other words, the miles left is the same as the minutes left.
The third and final method I created was GoogleRouteApiTripInfoProvider. This one takes the user’s current location, the destination, and then calls Google’s Routes API to get the time and distance left. To reduce calls to Google’s API, it would estimate time remaining by subtracting distance traveled and time between location updates, only periodically re-calling the Google API to get a better estimate of time left.
There is one bug in the code - in BluetoothService.kt, when I attempt to send over the text to display, either I’m sending over the text before the socket connection opens, or I close the connection before the text is sent:
val socket = device.createRfcommSocketToServiceRecord(uuid)
socket.connect()

val output = socket.outputStream
output.write("$text\n".toByteArray())
output.flush()

socket.close()
In either case, I probably should’ve opened the connection once and only close it if the activity is closed.
For further debugging, I used the Logcat Reader app so I could see my app’s logs while I was on the road, and this Serial Bluetooth Terminal app to send any text I wanted to my LED matrix display.
My Kids’ Reaction
My kids definitely got a kick out of it. My 7-year-old son especially liked that I could send messages via the display. On one a recent trip, I made the display say “McDonald’s” as we pulled into the parking lot for the restaurant.
Leave a Reply
