
An Elephant Cake for My Son's Birthday
This site utilizes Google Analytics, Google AdSense, as well as participates in affiliate partnerships with various companies including Amazon. Please view the privacy policy for more details.
So I asked my son what kind of cake he wanted for his fourth birthday, expecting him to tell me what flavor. Like strawberry, chocolate, or vanilla.
“I want an elephant cake!” was his answer.
For context, I’ve been making the kids’ birthday cakes ever since my son’s first birthday. Since this is my son’s fourth birthday, and my daughter is two, I already had five birthday cakes under my belt (or maybe more like in my belly).
But they’ve all been simple rectangular cakes baked in a standard 9x13 glass baking pan. An elephant cake is a whole other beast.
So did I give up? Nope - after realizing I didn’t need to make a hyper-realistic life-size elephant cake and that something cartoony would work, I began by searching elephant cake on Google to get some inspiration.
I eventually came across this pink elephant cake.
If you look at the above link, you’ll notice there’s not much in the way of instructions. So, before I began baking (ok - maybe during baking) I began to prototype my cake layout in Inkscape.
Here’s the prototype in SVG format:

Ok, let’s back up a bit and go through my thought process while prototyping the elephant cake:
- I used two eight-inch round cake pans.
- One pan will serve as the body.
- The other pan will serve as both the head and the trunk, tail, and legs.
The head is simply a smaller circle; the head, trunk, tail, and legs come from the remaining outer circle. The outer circle is about two inches thick - meaning the inner circle has a diameter of four inches (or a two-inch radius).
After playing with various degrees, I decided that each leg would consist of 60°, the trunk would be 90°, and the tail would be 30°. If I did my math right, those should add to 360°:
60° × 4 + 90° + 30° = 360°
Once the cake was done baking, it was time to do the work.
I placed each 8” cake on a separate large, flat cookie sheet. One sheet would be for the final product - the cake I put on that sheet would be the body. On the other sheet, I put what would be the head and the other parts.
To make the inner circle, I traced a 6” circle with two toothpicks and a string (actually a bit of dental floss). The string actually was 6” that I looped so that it could stay attached to both toothpicks.
I didn’t do any cutting with the toothpicks - this was purely to outline the circle.
I didn’t have a protractor, so I couldn’t measure the degrees for the feet, trunk, and tail. Instead, I did a bit of math.
Knowing that the cake diameter is 8”, I know the cake circumference is about 25”:
diameter × π ≈ 8" × 3.14 = 25.12"
I also know that, for the feet, 60° is a fraction of the circle - 60/360ths to be exact. This means the outer circumference for each leg is about 4”.
I’m too lazy to reduce it (except maybe by removing the trailing zeroes) so the math looks something like:
25" * 6/36 ≈ 4.1667"
Again, I cut a string to four inches to measure the distance. And since the tail is half the size of the legs, I fold the string in half to measure for the tail.
And since all that remains after I cut out the legs and tail is the trunk, I don’t have to measure the trunk.
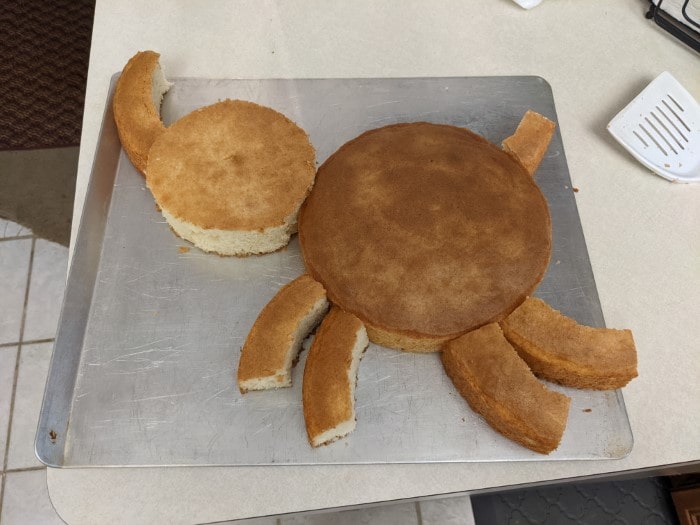
Here’s what the elephant cake looked like before I put any icing on it:
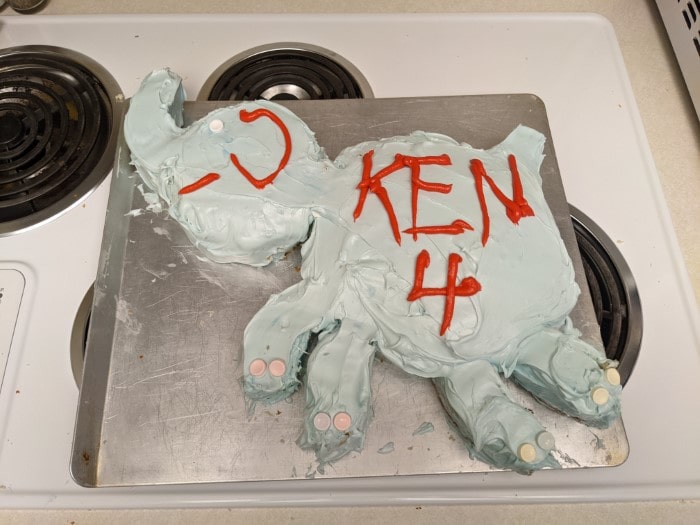
To make the blue icing, I just mixed regular white icing with a little bit of blue food coloring.
The eye and toes were just smarties - the eye, of course, was a white smartie.
And finally, the ear and text were red icing that came in a tube. (I think I should have chosen a color other than red - it made the text look a bit like it came from a slasher film.)
And, before I end this post, I present to you the finished Elephant Cake:
Leave a Reply
